Guide to Photographing Birds at the Ocean City Welcome Center Rookery, NJ
The rookery at the Ocean City Welcome Center in New Jersey is one of the most accessible and beginner-friendly bird photography spots on the East Coast. Located along the Route 52 Causeway between Somers Point and Ocean City, this site offers an elevated viewing platform, a lower-level boardwalk, and clear views of an active rookery filled with nesting wading birds. Whether you are new to wildlife photography or looking for an easy-access location to practice your skills, this rookery provides an ideal opportunity.
Acknowledgment of Risk
This guide is intended to provide helpful information for photographing wildlife at the Ocean City Welcome Center Rookery. While the location is publicly accessible, well-maintained, and beginner-friendly, visitors are responsible for their own safety and actions while on-site.
By using this guide or visiting the rookery, you acknowledge that outdoor photography carries inherent risks. These may include, but are not limited to, exposure to weather conditions, trip or fall hazards, insect bites, or interactions with wildlife. While these risks are minimal in a setting like the Welcome Center, all visitors should use caution, stay on designated paths and platforms, and exercise good judgment at all times.
This guide is for informational purposes only and does not replace local signage, official rules, or personal responsibility. Always follow posted regulations and be mindful of your surroundings.
Guide Legend: Photographing Birds at the Ocean City Rookery, NJ
Introduction
Acknowledgment of Risk
About the Rookery
Accessibility and Beginner-Friendly Features
Getting There
Best Times to Visit
Camera Settings for Bird Photography
Composing Images of Nesting Birds and Chicks
Ethical Bird Photography Practices
Recommended Gear
Summary


About the Rookery
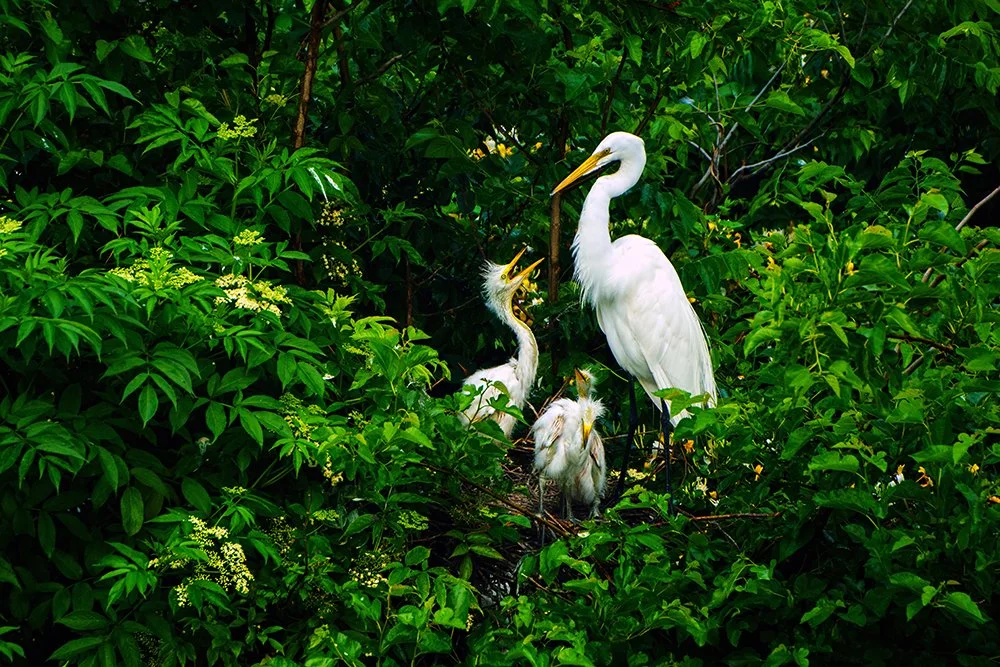
The rookery is home to a diverse range of colonial nesting birds that return each spring and summer to breed and raise their young. Species commonly seen include:
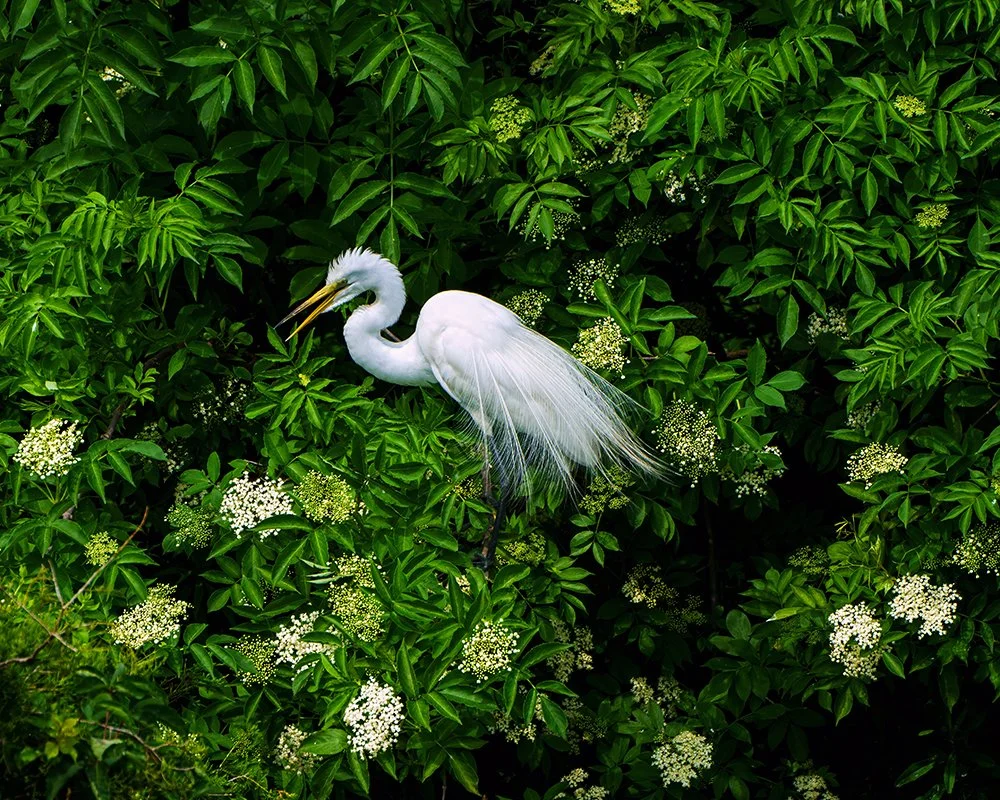
Great egrets
Snowy egrets
Glossy ibises
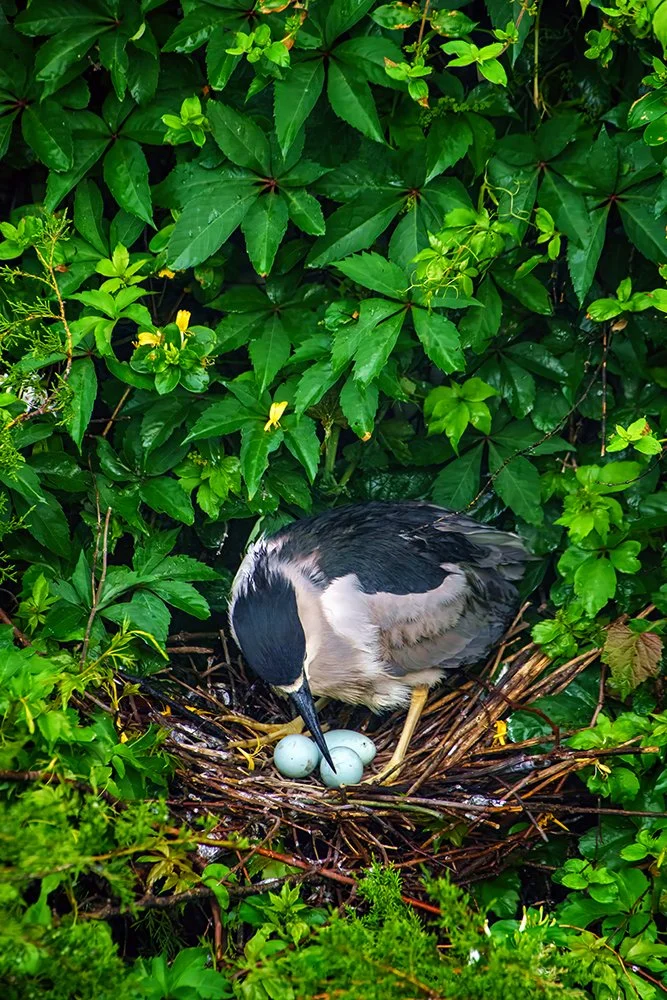
Black-crowned night herons
Yellow-crowned night herons
Little blue herons
Nesting activity peaks in late spring, offering excellent chances to photograph birds building nests, feeding chicks, and engaging in courtship and territorial behaviors.
Accessibility and Beginner-Friendly Features
This location is especially welcoming for photographers of all levels due to its thoughtful design:
Wheelchair-accessible ramps connect both upper and lower viewing areas.
Designated parking is located at the Welcome Center, with easy access to both levels.
An elevated boardwalk and viewing platform allow for stable shooting with minimal gear.
Benches and railings provide comfort and support for longer sessions.
Because birds are nesting close to the viewing platform, even photographers using shorter zoom lenses or smartphones can capture quality images.
Getting There
The Ocean City Welcome Center is located at 300 W 9th Street, Ocean City, NJ 08226. The rookery is visible from the parking area, and no hiking is required. The facility is located right on the causeway and is open to the public during daylight hours.

Best Times to Visit
Time of Day
Morning hours from sunrise to mid-morning are ideal. The sun rises behind the rookery, providing good backlighting early, with strong sidelight as it rises further. Bird activity is highest during these hours.
Time of Year
Late March through July is peak nesting season.
April and May offer the most dynamic action, including nest-building and courtship displays.
June and early July often feature visible chicks in nests.
By August, activity slows as birds begin to disperse.
General Photography Tips
Bring a telephoto lens if possible (200mm or longer) to get close-up shots of nests and birds.
Use a tripod or monopod for stability, especially when shooting in lower light or with heavier lenses.
A wide-angle lens can also be useful for environmental shots that capture the full scope of the rookery.
Shoot in burst mode to catch movement like feeding or flight.
Focus on the eyes for the most engaging images.
Use natural light, and avoid flash, which can disturb nesting birds.
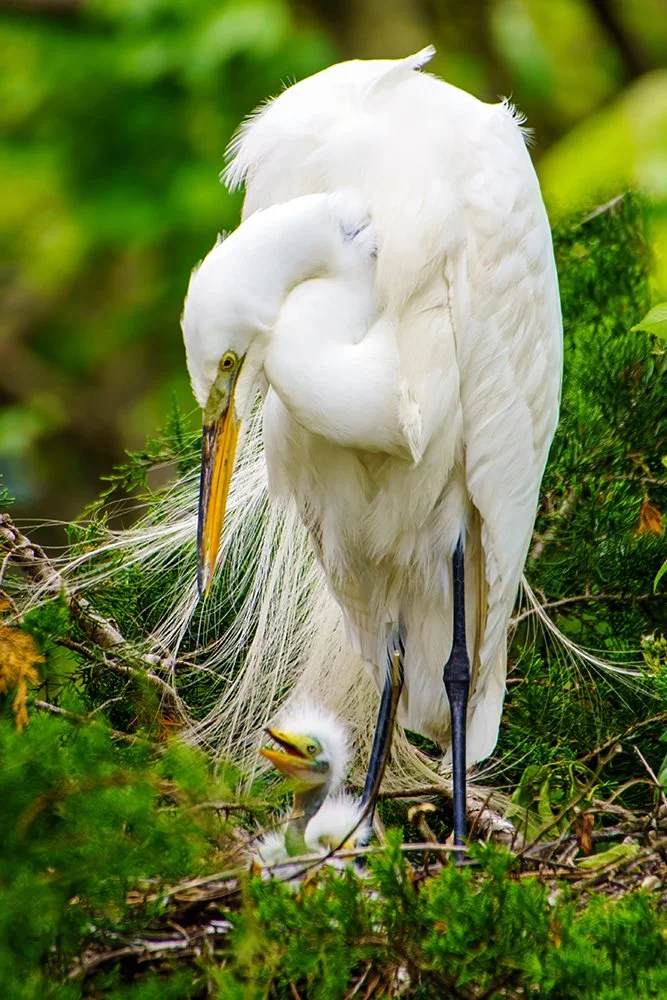
Composing Images of Nesting Birds and Chicks
Photographing nesting birds and their young offers a unique opportunity to capture intimate, story-rich moments in nature. Composition plays a key role in conveying emotion, behavior, and the environment without disturbing the wildlife. At the Ocean City Rookery, the close proximity to active nests allows for compelling images, even with moderate focal lengths. Here are some tips for effective composition:
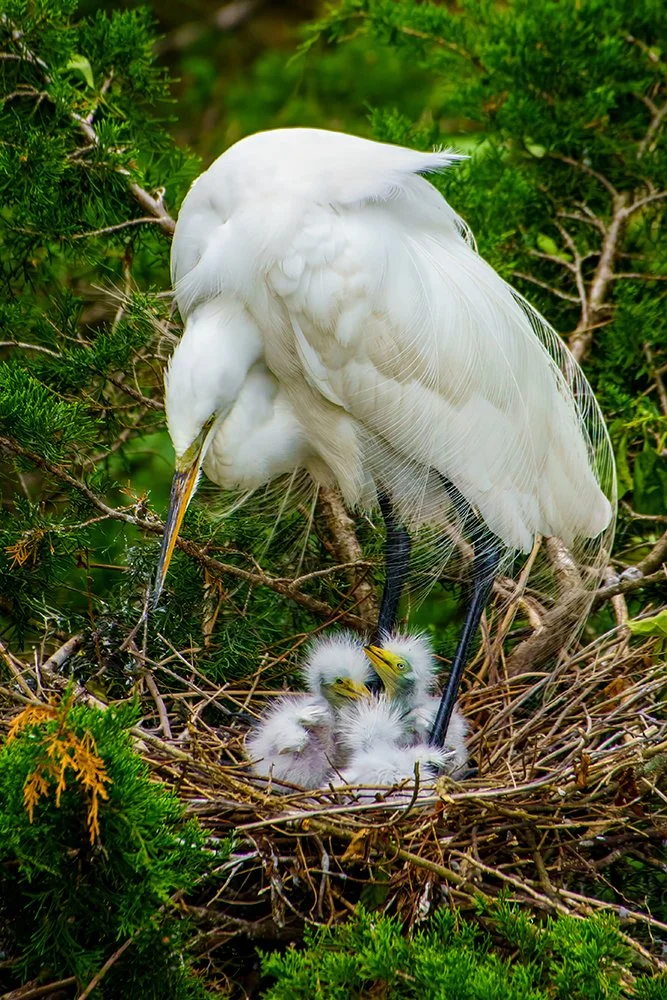
Prioritize the Eyes and Interaction
Focus on the eye of the adult or chick to anchor the viewer’s attention. If chicks are being fed, nuzzling, or calling, time your shot to capture the moment of interaction. Use burst mode to catch subtle expressions or feeding sequences.
Include the Nest for Context
Framing the nest in your composition tells a more complete story. Step back slightly or zoom out just enough to keep the nest structure and surrounding branches in frame, giving a sense of place and natural behavior.
Use Diagonal Lines and Layers
Look for branches, necks, or beaks that create diagonal lines. These guide the viewer’s eye across the frame and add a dynamic quality to otherwise static scenes. Layers of vegetation or other birds can add depth.
Control the Background
Move slightly left or right to find cleaner backgrounds that don’t distract from the subject. At the rookery, water, sky, or distant foliage often provide a neutral backdrop. Use a wider aperture (f/5.6–f/7.1) to softly blur the background and isolate the subject.
Respect the Scene’s Balance
If photographing more than one bird in the frame (such as parent and chicks), give them space to “breathe.” Avoid cutting off important parts of the frame like wings, beaks, or the edge of the nest unless it's a deliberate creative choice.
Capture Behavior, Not Just Portraits
Look for moments of motion—preening, feeding, vocalizing, or wing stretches. These behaviors bring life to your image and provide insight into the bird’s natural role as a parent or chick.
Be Patient and Observant
Spend time watching before shooting. Understanding a bird’s rhythm helps you anticipate the best compositional moments. Birds often repeat certain behaviors or feeding routines that you can prepare for in advance.

Camera Settings for Bird Photography at the Rookery
Whether you're capturing a bird perched in a tree, soaring overhead, or nesting in a dramatic coastal scene, using the right settings can make the difference between a sharp image and a missed opportunity. Below are recommended starting points for common types of shots. These can be adjusted based on light, gear, and creative preference.
Perched Birds (e.g., herons, egrets, ibises at rest or nesting)
Mode: Aperture Priority (A or Av) or Manual
Aperture: Your f-stop will depend on whether you want a blurry background (use f/4 or f/5.6 for blurry bg) or if you would like the background and subject sharp (use f/8 to f/11)
ISO: 200–800 depending on light
Shutter Speed: 1/500 sec minimum
Focus Mode: Single-shot AF (AF-S / One Shot)
Metering: Evaluative/Matrix
Stabilization: Use a monopod or tripod for added sharpness
Tip: Focus on the eye and shoot slightly off-center for stronger composition aka Rule of Thirds
Birds in Flight
Mode: Manual or Shutter Priority (S or Tv)
Shutter Speed: 1/2000 to 1/4000 sec (faster for small or fast birds)
Aperture: Lowest possible or “wide open”. Ideally use f/4 if your lens can, although f/5.6–f/7.1 works too
ISO: Auto ISO with a max limit set (1600–3200 depending on camera)
Focus Mode: Continuous AF (AF-C / AI Servo)
Drive Mode: High-speed burst
Focus Area: Dynamic / Zone AF (depending on your system)
Stabilization: Turn off IBIS or lens IS when using high shutter speeds handheld
Tip: Pre-focus where you expect birds to fly through and pan with the motion.
Scenic or Environmental Wide Angles
Mode: Aperture Priority or Manual
Aperture: f/8 to f/11 for greater depth of field
ISO: 100–400
Shutter Speed: Varies (1/125 sec or faster handheld; slower with tripod)
Lens: Wide-angle (16–35mm or 24–70mm)
Focus Mode: Single-shot AF
Focus Point: One-third into the frame (hyperfocal distance)
Stabilization: Use a tripod or brace against railing if possible
Tip: Use early morning light or golden hour for soft shadows and warm tones, and include birds in the environment for context.
Backlit or High-Contrast Situations
Exposure Compensation: +0.3 to +1.0 EV to avoid silhouettes when backlit
Shoot in RAW: To recover shadows and highlights in post-processing
Use Spot Metering: When exposing for bright white birds like egrets
General Tips for Sharp, Clean Images
Always shoot in RAW or RAW+JPG for maximum editing flexibility
Use a fast enough shutter to match your focal length if hand-holding (1/focal length as a minimum guide)
Keep your ISO as low as possible while maintaining adequate shutter speed
Use lens hoods to reduce glare and protect against weather
If you struggle with a heavy telephoto lens, try a modern quick deploy monopod with “feet”
Ethical Bird Photography
Stay on designated walkways and platforms. Do not approach the birds or attempt to enter vegetated areas.
Never feed the birds, as it disrupts natural behavior.
Respect the minimum distance. At this location, birds are naturally close, so there is no need to crowd or use calls to attract them.
Keep noise to a minimum, especially during early morning hours or around young families and other observers.
Recommended Gear
Camera body with fast autofocus and decent low-light performance
200mm to 600mm telephoto lens
Monopod or tripod
Extra batteries and memory cards
Lens cloth (especially for humid mornings)
Lightweight stool or knee pad for lower-level shooting (optional)
Additional Resources
The Ocean City Welcome Center often has printed brochures and up-to-date information about current bird activity.
The New Jersey Audubon Society periodically offers bird walks and events at this site.
The Cape May Bird Observatory provides seasonal updates and information on coastal birding throughout the region.